First, we have our main prop, the Super Colossal Rex which needs to go from this...

...to this. Or at least as close to it as possible.

As you can see, there are some things that need to be changed. 1) This toy represents the Tyrannosaurus from Jurassic World: Fallen Kingdom, so any scars that she may have will need to be filled in, 2) the eyeballs are way too small on this sculpt so we'll have to mold some new ones and 3) the teeth on this sculpt are just a little too big and molded together so those will have to either be filed down or removed entirely and replaced with new ones, I honestly haven't decided yet. Thankfully, I think I know what we can use for 1 and 2. This is all going to be trial and error so let's see how this goes.


First off, the sculpt has some seam lines on it from being put together in the assembly line. Some are more noticeable than others so I followed a literal rule of thumb: I ran my thumb over the seam line and if it felt like my skin was getting into the seam, it got patched up. So I used this Tamiya modelling putty to cover those up. This is a more liquidy than the Milliput we'll be using later and the surfaces where the seam lines sit are fairly smooth so I'm hoping that it won't be as noticeable. So we just take this tube...


...and basically dab the stuff on like a bingo marker. Then, depending on how much room I had to maneuver around on the sculpt, I used either a foam brush or a tooth pick to flatten out the putty and use any excess to continue along the seam lines. I repeated this process over any seam lines that stood out until I had gone over the entire dinosaur. If you're using this stuff, try not to rush but do bear in mind that this stuff dries and cures fast. Like, not even two minutes after I had taken this picture, it was firming up.

If anyone reading doesn't have this figure, for reasons I don't fully understand Mattel decided to have the ankles articulated. I myself am not a fan of this feature so I patched up those lines too.

Okay, so now that the seam lines have been puttied, we need to make sure the rule of thumb still applies. I found when doing this that sometimes the Tamiya putty dried into pointy bits so if my thumb catches those, I gently sand down those points with the corner of a sanding block. No need to scrub it back and forth, just a few soft strokes should do it because we don't want to accidentally sand off some of the texture of the sculpt.


For those of you who don't know, Milliput is a two part putty epoxy that you knead together for model making, sculpting or even household repairs. I use this stuff on the Hasbro Jurassic World figures to fill in those annoying screwholes and it works great. So we're gonna fill in those Velociraptor/Indominus Rex scars. Now this stuff takes a full 24 hours to cure (I'm pretty sure) so there's plenty of wiggle room just in case if I need to run some sculpting tools over it.


Since this box was almost done, I just lumped these two parts together since we'll probably end up using this whole chunk. Simply mix the two pieces together and knead/roll them in your hands for about five minutes or until it is one solid color. Then I tore little pieces off, rolled them into long thing strips...


...and then laid them into the scars. Once they're in, I flattened the pieces with my thumb to fill out the scar lines so that the putty doesn't stick out above the sculpt, or at least try to. Worst case scenario, I can always sand these down later.

Yeah, some sanding will probably be in order. In the meantime, let's get some creases in that Milliput to match the sculpt.

That's better. Needs a few more but I scratched them in off camera.

I also noticed these creases at the front of the snout. I don't know if they're just from the fact that this sculpt is of a female Rex or of a more elderly animal (the Rex on Isla Nublar has got to be close to thirty, which is believed to be the age of the largest and best preserved T. Rex specimen, "Sue") but the infant from The Lost World doesn't really have these (at least not to this degree) so they need to be filled in too.
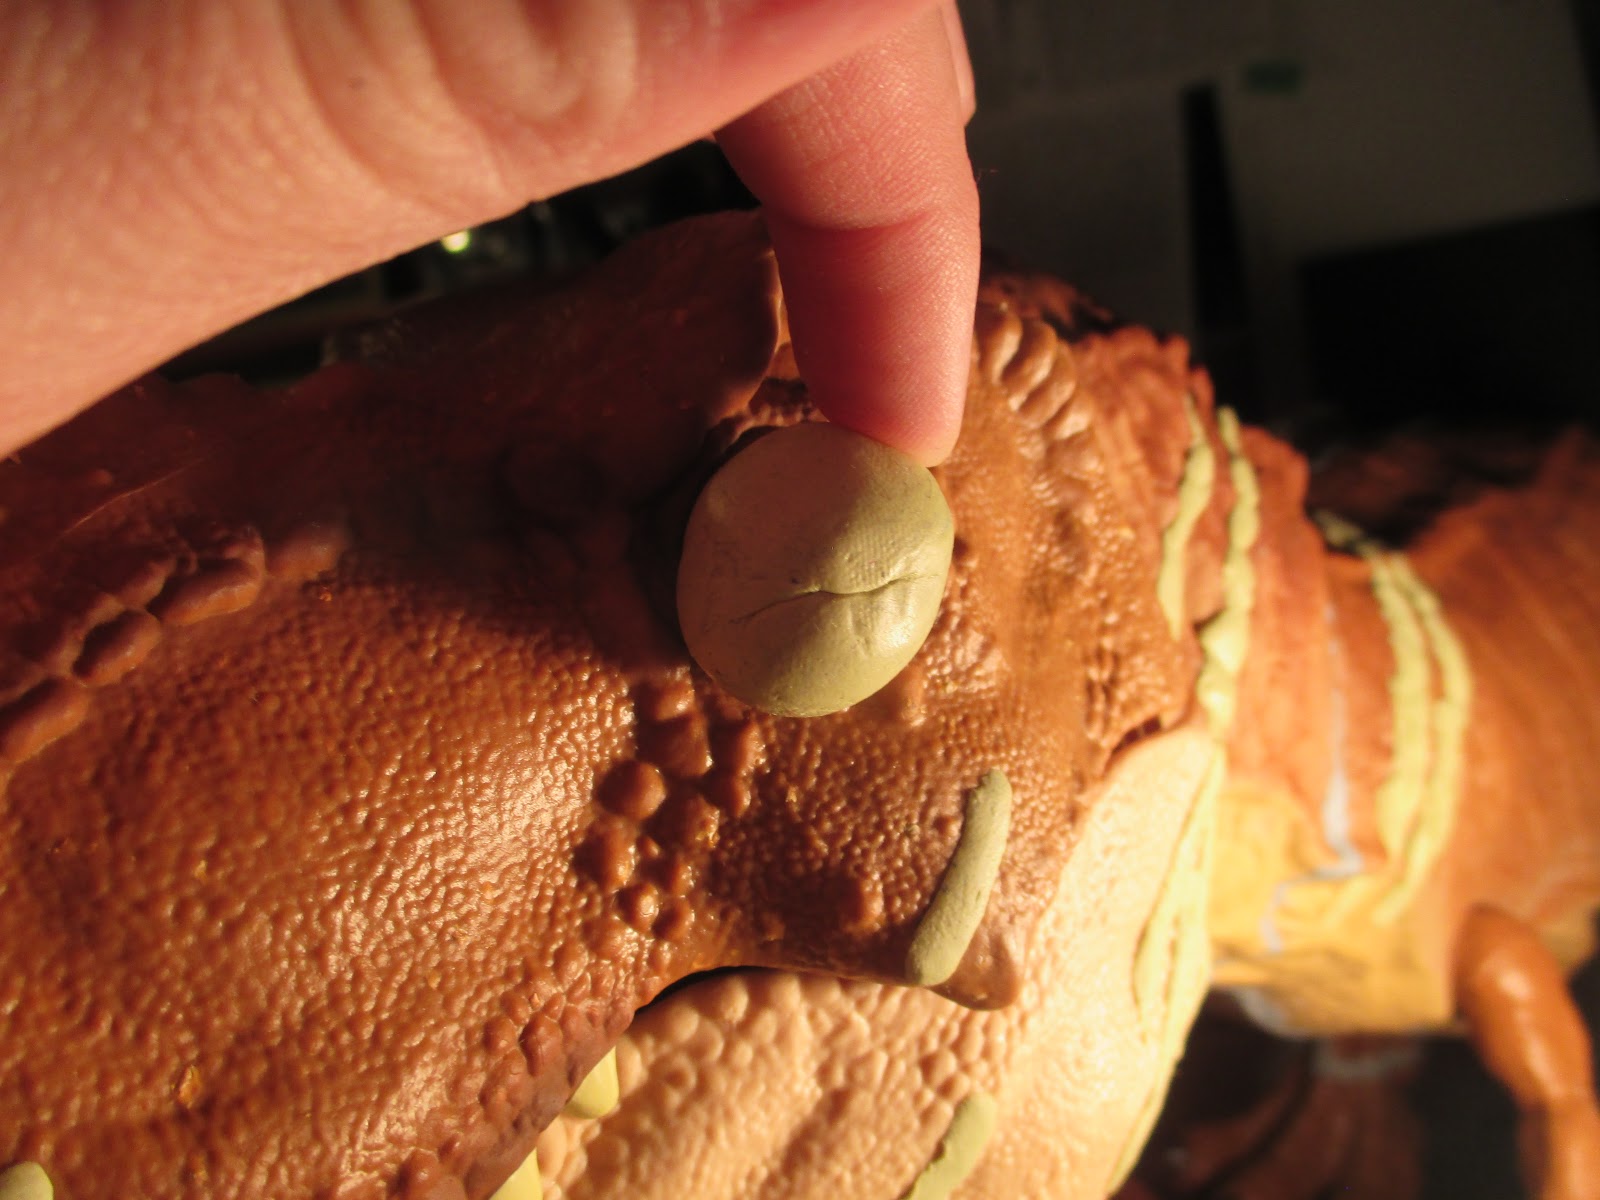
So this is what's left of the Milliput and it looks to be about the right size to fit in the socket. So what I'm going to do is turn this ball into a couple of eyeballs with eyelids and stick them into the sockets. First, we tear a piece off and roll it flat...


...then cut it in half. Now we have a set of eyelids. Repeat with another piece of Milliput and roll the remaining ball smooth. Cut the ball in half, put the eyelids on the top and bottom of the half balls and then stick into the eye sockets on the figure. Make sure the eyes don't cover the ridges around the eye socket. How does it look from the front?

In comparison to the infant Tyrannosaur maquette?

Alright, I'm pretty happy with how the eyes look. Now, we can't really do much else until the Milliput cures. When I went by my desk about 12 hours later to do laundry, the Milliput was rock hard but I had a bunch of housework to do so for all intents and purposes...

I sanded down the Milliput on the Rex just to smoothen it out. I left a bit of texture on it just because it doesn't feel off when you run your finger on it and I didn't want to sand any of the sculpt away.

Now for the teeth and gums. I've decided that I am going to cut these retail model teeth out with an Exacto knife and use Milliput to not only sculpt new teeth but also a gum-line that will house the teeth. As you can see, the teeth on this figure don't actually come out of the gums and I think we can do better. So first, the knife and the teeth come out.

The teeth are made of a soft, rubbery plastic so this knife cut through them like they were made of butter.


So I found two teeth of approximately the same size and stuck them together with the Tamiya putty so that this custom will have nice, rounded teeth and not flattened ones like the factory model. Upon closer inspection, I found that the infant's teeth aren't all quite the same size, especially along the bottom jaw but this tooth will serve as a reference so we'll just wrap some Milliput around it.

Let's see how it looks next to the Rex's head.

I think I can work with that. If I have to make smaller teeth, that shouldn't be too much of a problem. Before we jump into that, we need to see just how many we need so we gotta make some gums for this guy.

Just as a precaution, I had a couple little chunks of Milliput left over so I molded them into a couple more teeth so that my references would have some variety rather than trying to cut and paste the same tooth over and over, so to speak.

So every Jurassic Rex has an overbite and while this does make things easier, we do still need to make sure the mouth will shut smoothly, so we'll ball up some Milliput...

...put some along the jawline...


Now for the teeth and gums. I've decided that I am going to cut these retail model teeth out with an Exacto knife and use Milliput to not only sculpt new teeth but also a gum-line that will house the teeth. As you can see, the teeth on this figure don't actually come out of the gums and I think we can do better. So first, the knife and the teeth come out.

The teeth are made of a soft, rubbery plastic so this knife cut through them like they were made of butter.
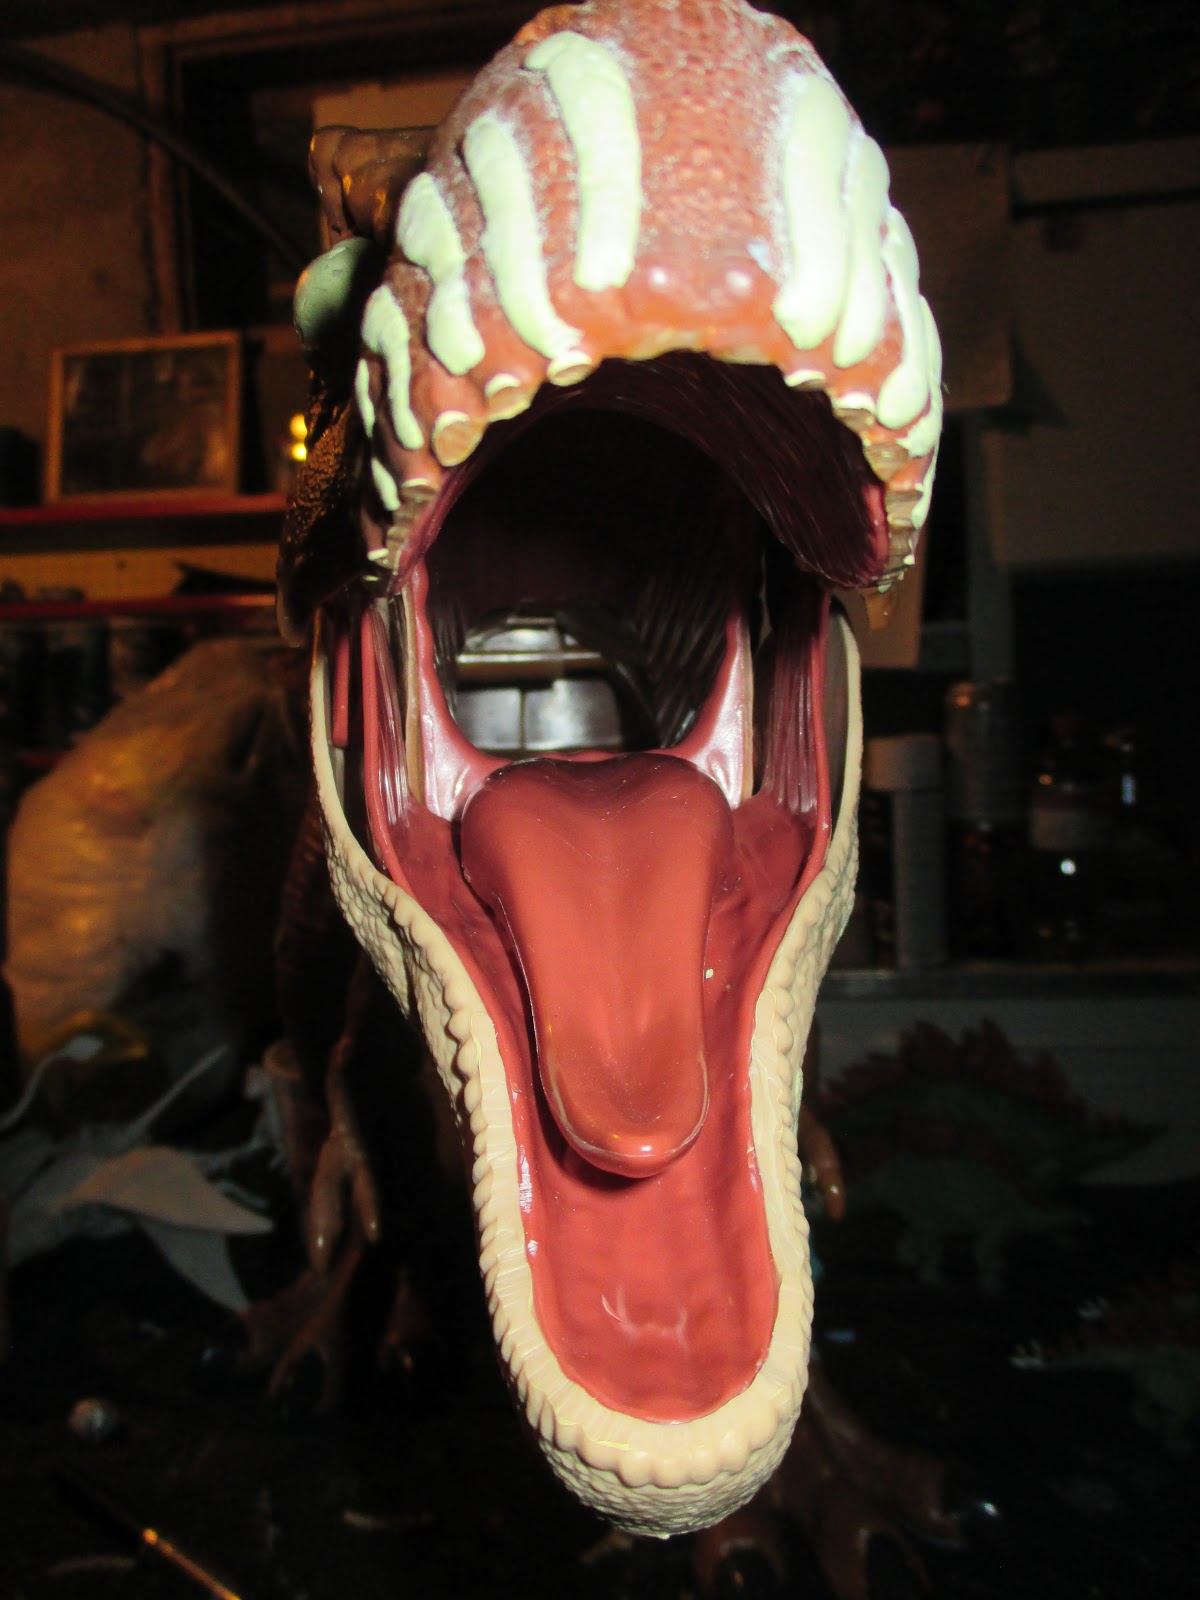
Man, a Tyrannosaur with no teeth. This just feels...wrong. Let's fix this as fast as we can because it hurts.

So I found two teeth of approximately the same size and stuck them together with the Tamiya putty so that this custom will have nice, rounded teeth and not flattened ones like the factory model. Upon closer inspection, I found that the infant's teeth aren't all quite the same size, especially along the bottom jaw but this tooth will serve as a reference so we'll just wrap some Milliput around it.

Let's see how it looks next to the Rex's head.

I think I can work with that. If I have to make smaller teeth, that shouldn't be too much of a problem. Before we jump into that, we need to see just how many we need so we gotta make some gums for this guy.

Just as a precaution, I had a couple little chunks of Milliput left over so I molded them into a couple more teeth so that my references would have some variety rather than trying to cut and paste the same tooth over and over, so to speak.

So every Jurassic Rex has an overbite and while this does make things easier, we do still need to make sure the mouth will shut smoothly, so we'll ball up some Milliput...

...put some along the jawline...

...and test. Voila, it closes nicely. Now we'll fill out the rest of the gum-lines and then we can start adding our teeth.


So here's the left over Milliput from the gum-line with the reference teeth. I always make up too much of this stuff but at least I'll be able to put this to good use with the teeth. So I made little indentations in the gums with the cured teeth and then sculpted new teeth with the fresh Milliput. I would've used the three in the final sculpt but cured Milliput doesn't like to stick to fresh Milliput I've found out. So about half an hour later of rolling bits of Milliput and sticking them to the gums...

...we have this. Perhaps it isn't 100% accurate to the infant but I was on a bit of a time limit when I worked on this. If need be, I can always try sanding down the teeth to make them more fine tipped but right now, I'm really happy with how these turned out.
I do believe this covers any physical alterations needed to the sculpt so keep your ears to the ground for Part 2 where we'll be discussing painting the dinosaur. As always folks, thank you so much for reading and if you like what you see on this blog, you be sure to nudge that "Follow" button and stay cynical!
-The Cynic